Feeds:
Posts
Comments

Posts Tagged ‘Tomato’

We’re not talking Jersey Tomatoes here – No sir, this is all about those red plump stuffed cloth tomatoes.  My grandmother had one, my mother had one and I had one.  It ends here no doubt.  I know my daughter doesn’t have one and wonder how many of her friends do?  Not likely!  Wonder if any of them have the pins or needles or thread that also go into this homemaker’s essential salad?

Well be that as it may, I was surprised to receive an email extolling the virtues and the origin of this at-one-time-ubiquitious household tool.  The Sourcerer strikes again – twice in one week!!! Thanks to Gail who tipped me off about my mentor Martha’s article about pin cushions, tomato pin cushions to be exact and her take on 21st century examples.  

The following is excepted from Martha Stewart’s web site:

Pincushions come in all shapes and sizes, but the tomato is the design that prevails as the classic. But why a tomato of all things? Turns out it’s not random: There’s actually a reason for the tomato design, and it dates back to the Victorian era.

The first-ever documented mention of a generic pincushion dates back to the Middle Ages. Of course, in those days, they were more whimsically called “pimpilowes,” “pyn pillows,” and “pin-poppets.” The pincushion was invented as a practical aid for storing pins and needles, but it also showcased one’s collection of pins and needles. (Needles were costly, after all.) But the less-iconic shapes of dolls, birds, and prettily-packaged boxes left something to be desired.
Enter the time-honored tomato. According to tradition, placing a tomato on the mantel of a new home ensured prosperity by warding off evil spirits. When tomatoes were out of season, people weren’t totally out of luck: They simply improvised with red material, sawdust, and a little bit of ingenuity.

A lady of the Victorian era would take immense pride in a parlor room stocked with shelves upon shelves of pincushions, but the tomato was always the crowning acheivement of her collection. Since then, we’ve been piercing our pins into stuffed fabric tomatoes without question. But it’s “sew” much more fun to know where they come from, am I right?

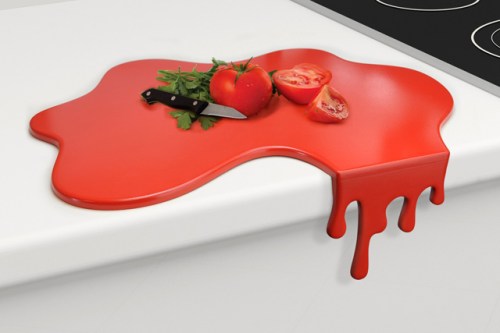
In this case a picture is really worth 1000 words:

NOT YOUR GRANDMOTHER'S PIN CUSHION

                      NOT YOUR GRANDMOTHER’S PIN CUSHION

Read Full Post »

a slow cooker Oval Crock Pot

A Slow Cooker Oval Crock Pot (Photo credit: Wikipedia)

Blessed are the meals made in crockpots for those are the days free to go and do and not worry about getting home to make dinner.

Today was a lovely sunny Saturday;  Just the kind of day to clean up the rest of the snow on the walkways, to throw peanuts out to the squirrels and of course with the bright sunshine, I was able to see some more of winter/old radiator  dust!  It was also warm enough for Peter to put the sensor light we bought a couple of weeks ago. The days are growing noticeably longer and so when we went shopping this afternoon to pick up this and exchange that, we stayed out quite late.  Then we stopped by to see our friends Joe and Michael and have a pre-dinner cocktail.  Soooo relaxing and WHY?

Because my supper was already mostly made!  This morning I prepared  a recipe that I had never tried before.  I knew this would be a good night to try it out.  It turned out to be not only amazingly rich, but also economical.  

2 TBS vegetable oil

3 lbs. boneless short ribs cut into 3″ pieces

coarse salt and pepper

1 medium yellow onion diced small ( I used a good size Mayan onion)

1 large carrot diced small (I chopped up quite a few small ones) (the kind that come in a bag already peeled)

1 can (28 oz) whole peeled tomatoes

2 sprigs of oregano or rosemary

Serve with pasta or soft polenta

In a large skillet, heat oil over med-hi.  Season short ribs with salt and pepper.  In batches, cook until browned on all sides, about 10 minutes.  Transfer to ribs to slow-cooker.  Pour off all but 1 TBS of oil and add onion and carrot.  Season with salt and pepper and cook until vegetables are soft, about 3-4 minutes.  Add 1/2 cup of juice from tomatoes, stirring and scraping bits up with wooden spoon.  Transfer veggies and liquid to crockpot and add tomatoes, breaking up.  Add sprigs.  Cover and cook on high till fork tender – 6 hours.  *I only had rosemary and removed them after about 2 1/2 hours).  Skim fat off. Remove meat and shred with 2 forks and return to pot.

 I thought it didn’t look like enough sauce for 1 lb of pasta so I added about 1/2 to 1 cup of a tomato basil sauce and about 1/2 to 3/4 cup of red wine and heated it through in the slow cooker.  My intention was always to serve this Ragu over large shells pasta although I think the recipe may have been meant to be a main meat dish, served with sides of polenta or pasta and a vegetable.  We ate it as a pasta dish with Italian bread and a salad.  It was one of the richest sauces I have ever tasted.  And economical too.  

The costs were: Short ribs – $10.44

 Tomatoes – $1.49

                                      Bag of peeled carrots $1.29

                                      Box of large shells $1.29

                                     Mayan onion $1.00

                                    Italian bread – $1.39

                                   Half bag of salad mix w/dressing – $2.50

Enhanced by Zemanta

Read Full Post »

I LOVE TOMATOES and if you’re a follower of this blog you know how often I extoll the virtues of Jersey tomatoes.  So no one should be surprised that eventually this countdown to Christmas blog would find a Foodie gift for tomato lovers.

Look at this wild and crazy cutting board!  Really now, a tomato bleeding all over the counter?  You know I just had to include this in Foodie Gift category.  There are serious Foodie gifts and delicious Foodie gifts and I guess you can put this one in the whimsical category.

Bloody Tomato

Bloody Tomato

Hopefully this isn’t a sign of things to come… But The Splash Chopping Board looks as though it’s bleeding off your countertop.
Designed to remain stable while you work, the durable surface will hold up to all of your cutting needs. And, the ‘drip’ is easily removable for cleaning and storage. Available at The Foodiggity Shop, $18.99.  **

**Excerpted from Foodiggity.com

Read Full Post »

Sunday sauce

Sunday sauce (Photo credit: letouj)

This past weekend, I decided to make Sunday Sauce.  It is so tasty, so delicious and even though it takes a long time to cook down, it is well worth it.  Pick an afternoon you’ll be home and soon your home will be filled with the aroma of simmering tomato sauce.  I thought I could make it in my crockpot BUT my crockpot was not big enough.  Using a crockpot would make the whole process easier since you could just let it simmer away for hours.

I started with a large stockpot but then thought, “Oh why not use the crock pot?”   I filled the crock pot and still had a lot of sauce in the braising pan so now I had to make a decision;  I took half of the meat out of the crock pot and put it in the braising pan and cooked the sauce in both.  I tell you all this so you won’t make the same mistakes I made which made a fairly simple recipe into a complicated process.  Mangia!

SUNDAY SAUCE

(but you can call it Gravy!)

1/4 cup Extra Virgin Olive Oil

1.5 lb of boneless country spare ribs ( I used bone-in)

6 links of Hot Italian Pork Sausage (I used Hot Poultry Sausage)

2 cups (16 oz) chopped onions

8 TBSP of minced garlic (from jar) OR 20 cloves minced

2 cans of tomato paste

4 cups of water

6 cans of coarsely ground Italian tomatoes

4 TBSP dried basil (I used 2TBSP and basil from my yard)

16 meatballs (cooked)

Salt and Pepper to taste

You’ll need a large braising pan and a 16 Qt stockpot

Heat olive oil in large braising pan on MEDIUM HIGH; add ribs and sausage.  Cook, turning 2-5 min, until meats are browned on all sides.  Transfer meats to stockpot.

Reduce heat to LOW.  Add onions and garlic to braising pan; cook, stirring, 10 minutes, until veggies are translucent.

Raise heat to MEDIUM; add tomato paste.  Cook, stirring, 3-4 minutes, until paste just begins to brown.  Add water, stirring to loosen browned bits on bottom of pan.  Bring to simmer.

Transfer tomato paste/water mixture to stockpot. Stir in canned tomatoes and basil.  Bring to simmer on MEDIUM.  Reduce heat to LOW.  Cook, stirring occasionally, 5 hours.  Add cooked meatballs.  Cook, stirring occasionally, 1 hour.

Carefully transfer meats to serving platter; cut meats into manageable pieces. Transfer sauce to serving bowl.

Recipe from Wegman’s MENU magazine

Congratulations to me! This is my 1000th blog post!  Wow, I’ve had so much fun doing this, I hope my readers/followers are enjoying  this journey too.  Thank you for all your support and comments.  

Read Full Post »

I LOVE peanut butter and I LOVE tomatoes.  Of course if you are a regular reader of this blog you already know that.  The blog is a testimony to Peanut Butter and Jelly Sandwiches, my favorite, my kids favorite and now my adorable granddaughter, Finley’s favorite.

 Tomatoes, especially Jersey Tomatoes are a passion of mine.  I eat them all summer long and as far into fall as I can.  Once there are no locally grown tomatoes, I literally STOP eating fresh tomatoes!  I have vintage tomato salt and pepper shakers, a tomato-shaped tea pot, tomato sugar and creamer, tomato cookbooks, a collection of cans of Italian tomatoes and best of all, a tomato tattoo.  Well now that’s out there to the world.  I was born in New Jersey and I often describe myself (to my husband) as “one hot Jersey tomato” – that’s me.

And as if Big Boy, Beefsteak, Arkansas Traveler,Bella Rosa, Brandymaster Pink, Charger and hundreds more varieties weren’t enough to tantalize your taste buds, add Heirloom Tomatoes!  You’ve seen them with their bulbous, knobby, colorful shapes.  Sometimes they look weird, misshapen and in a palette of colors not necessarily in the red family!  They don’t always look appetizing, however, they are sweet and flavorful.   They come in a variety of sizes and add great interest to your summer salads.  But don’t let their use just end up in a wooden salad bowl – here are two Heirloom tomato recipes you will love to make and serve.

Heirloom Tomato Pesto Pizza

Heirloom Tomato Pesto Pizza

GRILLED HEIRLOOM TOMATO AND PESTO PIZZA

1 lb pizza dough

flour for dusting

4 tsp olive oil

1/2 cup basil pesto

1 lb Heirloom tomatoes thinly-sliced

1/2 tsp sea salt

1/2 tsp ground black pepper

3/4 cup crumbled feta cheese

Preheat grill to medium heat.

Divide dough into 4 balls, dust work surface with flour and roll each ball into a 9″ circle.  Brush both sides of the circles with olive oil,  place on baking sheet. Working with one circle at a time, place on grill rack and with tongs rotate the crust so it cooks evenly, browned on the bottom and air bubbles on top, 3-4 minutes.

Transfer pizza to baking sheet browned side up. Spread 2 TBS of basil pesto on crust and top with sliced tomatoes. Don’t cover entire pizza or it will be soggy.  Season with salt and pepper and dot with the cheese.  Slide pizza back onto the grill, close the cover and rotate pizza so it cooks evenly and cheese begins to melt – about 3 minutes.  Lift back onto baking sheet. Repeat with each pizza.

Roasted Heirloom Tomato Butter

Roasted Heirloom Tomato Butter

ROASTED HEIRLOOM BUTTER WITH THYME

1 very large or 2 medium-sized red Heirloom tomatoes

1/2 cup unsalted butter

1/2 tsp salt

1/4 tsp ground black pepper

1TBS chopped thyme or oregano

Preheat the oven to 375 degrees and line a small baking sheet with parchment paper.
Place the tomatoes cut side down onto the paper. Roast until the skins are wrinkled and blistered, and the tomatoes are very soft, 30-35 minutes depending on the size. Remove from the oven and let cool.

Place the tomatoes and any juices in the bowl of a foodprocessor. Process until very smooth and no seeds or large pieces of skin are visible, 2-3 minutes; stop and scrape down the sides of the bowl frequently.

Add the butter, salt, and pepper, and process until blended, stopping occasionally to scrape down the sides of the bowl, 2-3 minutes. Then, stir in the thyme and scrape into a small bowl and cover. (Or, make a log of butter by spooning it onto a sheet of waxed paper, folding the paper over the butter and rolling it gently until you have a sausage shape; twist the ends to seal.)

Refrigerate for at least 2 hours and up to 4 days. You can also wrap the log in foil and freeze for up to 3 months; thaw it in the refrigerator.

**Melt this concentrated compound butter over grilled steaks, toss it with flame-kissed vegetables, or freeze some for a burst of summer flavor in the winter months. Use very ripe, very red tomatoes for best color and flavor.

Thanks to Gail for sending me the article on Heirloom tomatoes!

Read Full Post »

Sweet Tomatoes, Creamy Mozzarella!

Sweet Tomatoes, Creamy Mozzarella!

Sunday night supper!  A few days ago I happened across one of Lidia’s recipes and it seemed simple enough and was just perfect for simple supper after a day at the beach.  I thought the season was perfect for Garden State ingredients but I was slightly off.  I called one of our favorite Market Stands and I was told that it’s still too early for native plum tomatoes.  As you know I’m a huge fan of Wegman’s but there are some vegetables that I will only eat in season and bought from a fruit and vegetable stand and tomatoes are definitely in that category.  Well, at least I had the fresh basil growing in my backyard!  Lidia allowed for the fact that you might not be able to get your hands on 2# of fresh plum tomatoes so she suggested you use a 28 oz can of peeled Italian tomatoes – so I did.

This really is a quick and easy recipe  and so damn good!  

1/4 cup olive oil

8 garlic cloves, peeled and crushed

3 # fresh plum tomatoes, peeled and seeded or 28 oz can of peeled Italian tomatoes

2 sprigs of fresh basil

pepperoncino (crushed red pepper to taste)

1 # Ziti

2 cups of mozzarella cubes ( 1/2″)

1/2 cup granna padano grated ( I used shredded Parmesan/Peccorino)

1/2 cup basil leaves, shredded and packed loosely

Bring a pot of  salted water to boil for the pasta.

Add the oil to a medium size saucepan over medium heat.  Add the garlic and cook till lightly browned – about 2 minutes.

Carefully add the tomatoes and their liquid.  Add the basil sprigs.  Bring to a boil and season lightly with salt and crushed red pepper.  

About 10 minutes after the sauce has been up on the stove, add the ziti to the boiling water.  Reduce the heat for the sauce to a simmer and break up the tomatoes. Sauce should get chunky and thick – anywhere from 10-15 minutes.

Taste the sauce and adjust seasonings  Lydia says to remove the garlic and the basil sprigs.  I didn’t.

Drain the ziti and add to the sauce – toss till pasta is covered with sauce.  Turn off the stove, add the mozzarella cubes and the grated cheese.  Serve immediately and garnish with shredded basil leaves.

Recipe by Lidia Bastianich


Read Full Post »

A whole and halved red bell pepper

A whole and halved red bell pepper (Photo credit: Wikipedia)

Well this is a first for me.  I am in the process of cooking and posting simultaneously.  This could be interesting or disastrous.  I have to keep jumping up to stir the vegetables in the braising pan.  I spent some time prepping, sort of creating my own                  mise en place.  I thought it would be prudent to chop each of the vegetables ahead of time so I could add them to the pan in order of the time it would take for that vegetable to soften.  

So I started with some olive oil in the pan and tossed in the celery. I chopped two stalks.   Originally I was going to start with the sliced garlic, however, I somehow never quite soften garlic without browning several;  I let them sauté a while and then added the Vidalia onion.  I had cut up about 1/2 of a largish medium onion.  I didn’t chop it or dice it, it was somewhere in between.

The idea here is to  put in those veggies that take longer to soften and also add some of their own liquid.  Next came Red Bell Pepper. I used a whole pepper and sliced and cut it up in about 1″ pieces.  I  tossed in the garlic slices a few moments ago.  Probably the vegetables are supposed to be crisp but I think my husband is not going to like this dish if everything is a little chewy.  I just tested a piece off celery and clearly that should have been on its own in the pot for longer before I started adding other ingredients.  And what does a good cook do?  I put the lid on the braising pan which should quicken some of softening and also add some more liquid because basically what juices and oil in the pan are supposed to be my sauce!   Oh boy, we’ll have to see how this plays out.

ALERT! I should have turned the gas down lower when I put the lid on – it was only a few minutes but the onions turned brown.  

I removed the lid and added zucchini and yellow squash.  I used 3/4 of the yellow and about 2/3 of the zucchini.  I put the lid back on and lowered the gas and I see that I don’t have much liquid in the pan.  I think I’ll be adding pasta water to this thin sauce but I still have the tomatoes to add and they’re juicy – I am loving me those Jersey Tomatoes.  This vegetable sauce is really a work in progress and I am up and down and up and down, stirring everything.  

I just put the pot of water on to boil – I will be cooking linguine which is Peter’s favorite.  The water is boiling but I turned it off because since I have never made this dish before I don’t really know how long it’s going to take and the veggies can sit in the pan while I cook the pasta.  I added the tomatoes and the mushrooms.  I had chopped up two fairly large tomatoes and sliced about 20 white mushrooms.  I also put the lid back on.  The lid is going on and off about as often as I jump up to stir or check the pan.

The linguine is in the pot and I checked the vegetables – the tomatoes are doing their job and juicing things up.  Of course mushrooms are mostly liquid and they’re helping.  Gotta go in kitchen and stir the pasta.

NOTE: When I added the tomatoes (which I had salted right after I cut them up so they would juice more) I added some salt and pepper to the mixture.  I’m going to sprinkle some Romano cheese into it also.

The pasta is almost done, I have scooped up a measuring cup of pasta water and turned off the sauce. It looks juicy and everything looks soft.  I’ve decided to serve it all in the braising pan.  I drained the linguine and put in the pan with the vegetables – It looks good!  I sprinkled some of the cheese all over the top and voila Dinner is served!

WHAT I LEARNED:

By writing a blog and cooking at the same time, I was really distracted and it was only when I opened up the refrigerator to get a beer, I saw the arugula.  Oh dear, that was supposed to be salad tonight-oh wellllllllll.

AND it was absolutely delicious!  I mean really delicious and we ate most of the pound of linguine I cooked.

Read Full Post »

Tomato

Summer Sumptuous

TASTY TIDBIT TUESDAY

If ever there was a time to indulge yourself in tomatoes, this would be it!  Fresh garden grown tomatoes are everywhere.  Even the large grocery stores are featuring state-grown produce.  The Jersey tomatoes are plump, juicy, sweet and so available and so this is the time to use them in as many recipes as possible.  And if your basil plant is looking like mine, you know it’s time to use up the leaves that got left behind when you were making tomato and onion and basil salad.  You WERE making that weren’t you this summer because really if you live in the Northeast, summer is really the only time you can eat tomatoes.  The other 9 months you’re eating a dark pink, hard, ethylene-gassed tennis ball.

8 oz. / 4 cups broccoli florets

2 oz. grated cheese

1/2 cup packed basil leaves

2 TBS olive oil

1/3 cup pine nuts

2 ripe tomatoes

Bring water to boil in covered pot.  Trim stems of broccoli, steam for 5 minutes until tender.  Reserve 6 TBS of the liquid, set aside.

You can use a food processor for many of these steps, however I don’t think it’s necessary to grate the cheese to equal 4 TBS.  Set aside.

Wash and dry basil leaves and pack into measuring cup.   Mince the garlic.  Add basil, olive oil and pine nuts in food processor and process till all is minced.  Add broccoli florets to food processor, if mixture get too thick, add water.  Add cheese and process to blend.

Serve over drained pasta.  Arrange sliced tomatoes along the side.

Read Full Post »

a slow cooker Oval Crock Pot

Image via Wikipedia

It’s Tasty Tidbits Tuesday and the crock pot is OUT – Summer must be over!

I have to say this is REALLY a delicious meal and economical as well.  I believe you can make this for less than $3.00 per serving.

1 pkg (about 1  1/2 lbs) chuck roast,  cut into 1″ cubes

Flour to dust beef cubes

2 TBSP Olive Oil

1 pkg of soup vegetables (16 oz) cut up

Salt and Pepper

1 carton (can) of beef stock (32 oz)

1 can (14.5 oz) of Italian style diced tomatoes

1 pkg or jar (24 oz) of seasoned tomato sauce

1/2 cup of Ditalini pasta

1 can (15.5 oz) garbanzo beans, drained and rinsed

1 pkg (6oz) baby spinach

Dust beef with flour. Heat oil on Medium-High in large skillet or braising pan till oil fairly smokes.  Add beef and brown till all sides are paper bag brown.

Transfer beef to slow cooker, don’t discard pan drippings; Season with salt and pepper.  Cook stirring, 3 minutes. Add to slow cooker.

Add stock, tomatoes and sauce to slow cooker.  Cover, cook 4 1/2 – 6 hours on HIGH.

or 8-10 hours on LOW.

Add pasta and beans 30 minutes before end of cooking on HIGH, or 45 minutes if you are cooking on LOW.

Add spinach to slow cooker; Stir to blend well.  Allow spinach to lightly wilt about 2 minutes.

Recipe courtesy of Wegman’s MENU magazine

Read Full Post »

Tasty Tidbits Tuesday

So the lazy hazy crazy days of summer are over and some people actually expect you to go back to the office.  What a bummer especially when one of the chief joys of summer at the shore was eating tons of fresh fruit; juicy peaches that DID run down your arm, musky cantaloupe so sweet in your mouth, and of course Jersey  Tomatoes!  Well there are still fresh tomatoes to be had and I say enjoy them while you can because in two months they’ll be serving tinted styrofoam balls.  This is a great dish to make and divide into two containers and take it to work!!!

canned chickpeas,

I use Progresso

3 oz. baby arugula (about 4 cups)

2 scallions,thinly sliced

1 can (15oz) chickpeas, rinsed and drained

1 cup cherry tomatoes halved

1/4 cup walnuts, toasted if desired

2 TBS red wine vinegar

2 TBS olive oil

coarse salt and pepper

Divide evenly between two airtight containers. Layer arugula, scallions,chickpeas, tomatoes and walnuts and refrigerate up to overnight.

In two more airtight containers, divide vinegar and oil for vinaigrette: season with salt and pepper. Cover and store at room temperature. To serve shake vinaigrette in containers and to combine and pour over salads and toss.  Serves 2

recipe courtesy of Martha Stewart Every Day Food

Read Full Post »

Older Posts »